Crochet Star Stitch Tutorial
The Crochet Star Stitch is a beautiful stitch, made with a two row repeat, that is perfect on it’s own, or as a decorative accent to your projects. It is a fairly easy stitch to master, but beautiful enough, even the most seasoned crocheters use it. If you prefer video tutorials, there is one at the bottom of the post.

Let’s Get Started
For this tutorial, I am using a worsted weight yarn and a size H/5mm crochet hook.
To start, create a chain of an odd number of stitches. I chose 21 chains for my foundation chain.

For our first row, we are going to half double crochet (HDC) in the 2nd chain from our hook, and in each stitch across. This will give us an even number of stitches for working our fabric. (So for those of you who want to chain a foundation row, instead of a foundation chain, make your first row an even number!)

When you get to the end of the row, make a turning chain of 3, and then turn your work. The side now facing you, after turning, will be the right side of your fabric. If you need to mark it, I recommend doing so now.

We now begin the first row of our 2 row repeat. The first stitch of this row is going to be different from the rest of the stitches on this row.
First Star Stitch
Insert your hook into the 2nd chain from the hook, and pull up a loop.
Insert your hook into the next chain, and pull up a loop.
Insert your hook into the first stitch of the previous row, and pull up a loop. Repeat in the next two stitches. You should end up with a total of 6 loops on your hook.
Yarn over, and pull through all 6 loops on your hook.

Insert your hook into each of these stitches and pull up a loop. 
You will have 6 loops on your hook. 
Yarn over, and pull through all 6 loops on your hook
Chain 1 to close the stitch. (Note, this creates two stitches to work into in our next row)

This creates the first star for this row.
Continuing the Star Stitch
To continue making the Star Stitch, we need to work our stitches down the side of the previous stitch and onto the fabric.
Start by inserting your hook into the eye of the stitch you just completed, and pull up a loop.
Next, step down and insert your hook into the previous stitch, right behind the front loop of the star, and pull up a loop.
Next, insert your hook into the stitch of the previous row that your first stitch worked into, and pull up a loop.
And do the same in the next two stitches of the row, insert your hook and pull up a loop.
You will have 6 loops on your hook.
Yarn over, and pull through all 6 loops on your hook.
Chain one to close the stitch.

Insert your hook into the marked spaces and pull up a loop 
First, insert your hook into the chain space, or eye, of the previous stitch, and pull up a loop 
Next, work behind the end loop of the bottom of the stitch 
Next work into the stitch the last loop of the previous stitch is worked into. 
Finally, insert and pull up loops from the next two stitches. 
Yarn over and pull through all 6 loops 
Chain to close.
Continue working down the row in this manner, working down the previous stitch and into the row below.
When you get to the end of the row, there will be one stitch remaining to work into. HDC into this last stitch.

Continue working Star Stitches until there is one stitch remaining. 
HDC in last stitch.
Row 2 of the Star Stitch Repeat
To complete the second row of the repeat, chain one, and turn.
Work 2 HDC into the first stitch, and 1 HDC into each stitch across. Remember to work into both the eye and the top of the stitches.

Work 2 HDC into the first stitch 
Work a HDC into the eye of the first star stitch 
Work a HDC into the top of the same star stitch
Continue working your rows alternating Repeat Row One and Repeat Row Two until your project is the desired size.
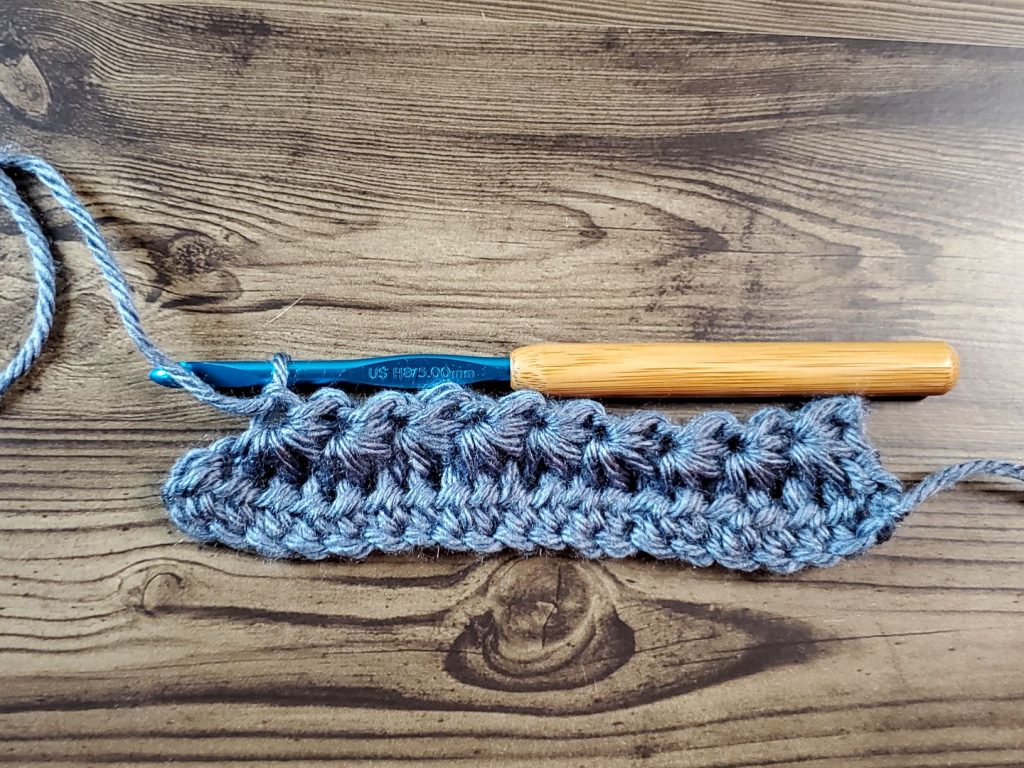
Your completed Star Stitch (both rows of repeats) will look like this.

Crochet Star Stitch Tutorial – Video
I hope that you found this tutorial helpful! Don’t forget to follow me on Facebook or join my Facebook Group for more patterns and tutorials! And remember, I would love to see what you’ve done!


