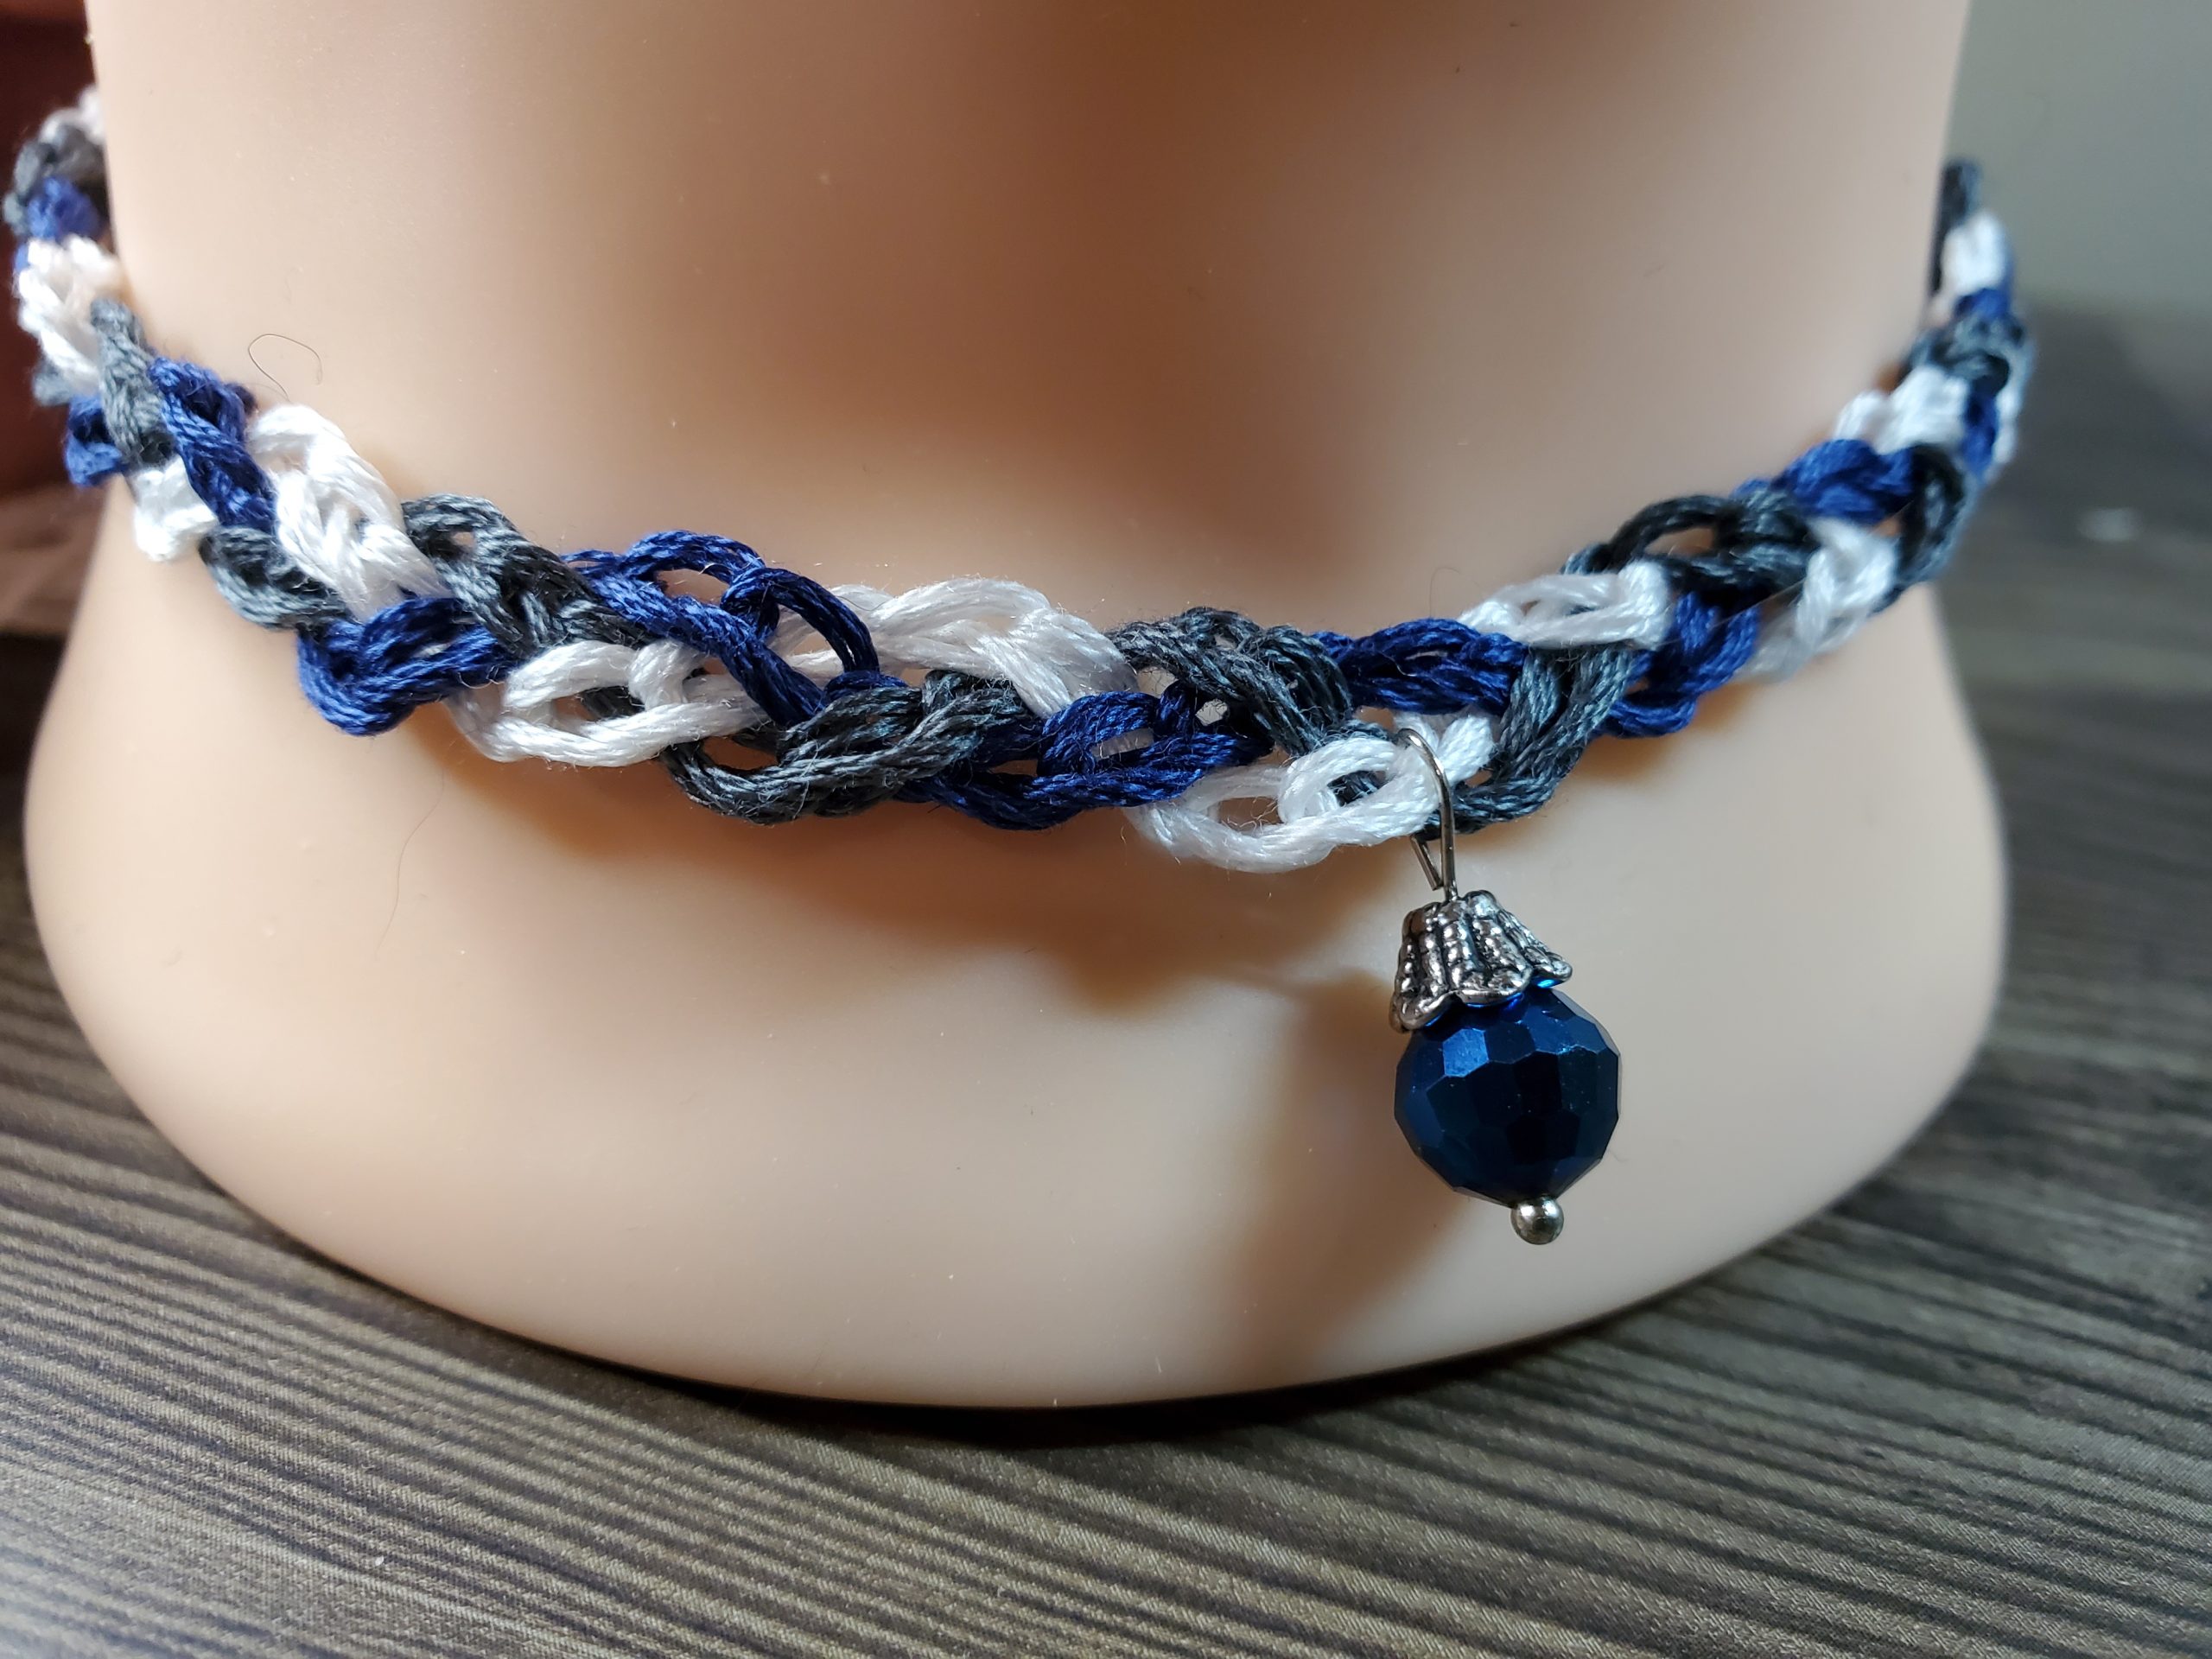
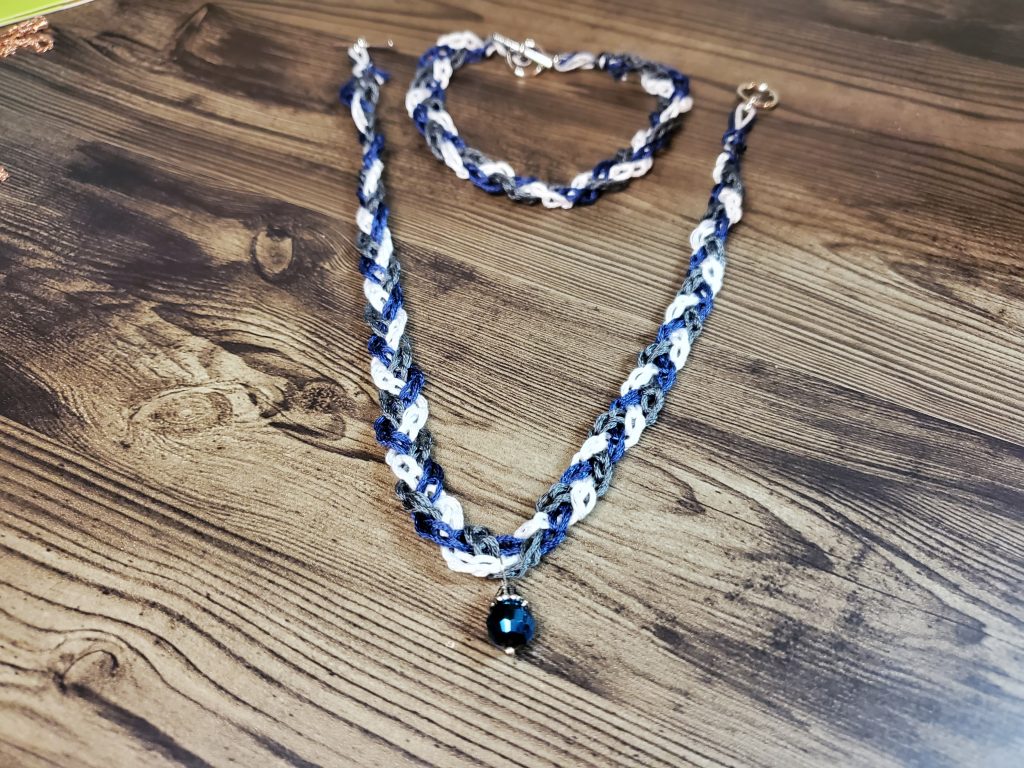
Crochet Chain Stitch Choker and Bracelet Combo
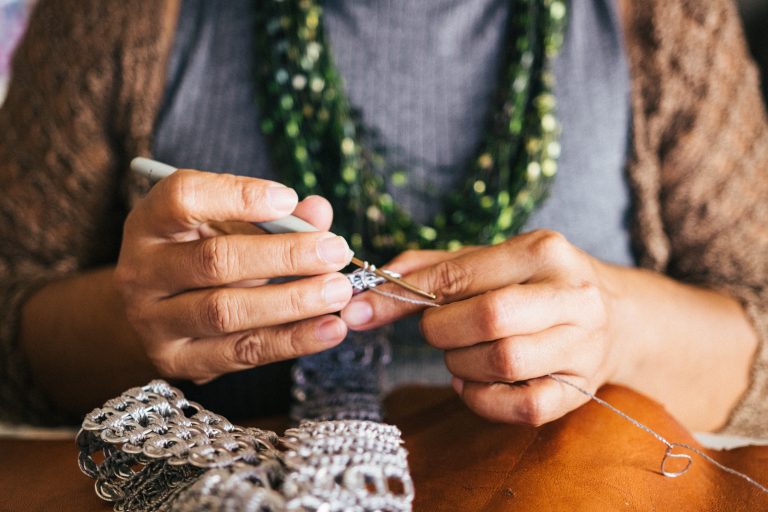
Welcome to Crochet Chain Stitch Project Two! I hope you’re enjoying these Crochet Chain Stitch projects I have put together! Today we are going to work on the Embroidery Floss Choker and Bracelet Combo. This is a bit more difficult than my Crochet Chain Stitch Project One – The Chain Stitch Wrap Bracelet, because it uses embroidery floss, rather than yarn, to create the project. Crocheting with the smaller threads can be much more difficult than crocheting with yarn; however, the results can be stunning.
Pro Tip: Remember to read through the entire pattern and/or directions prior to starting your project.
Things you will need for this project:
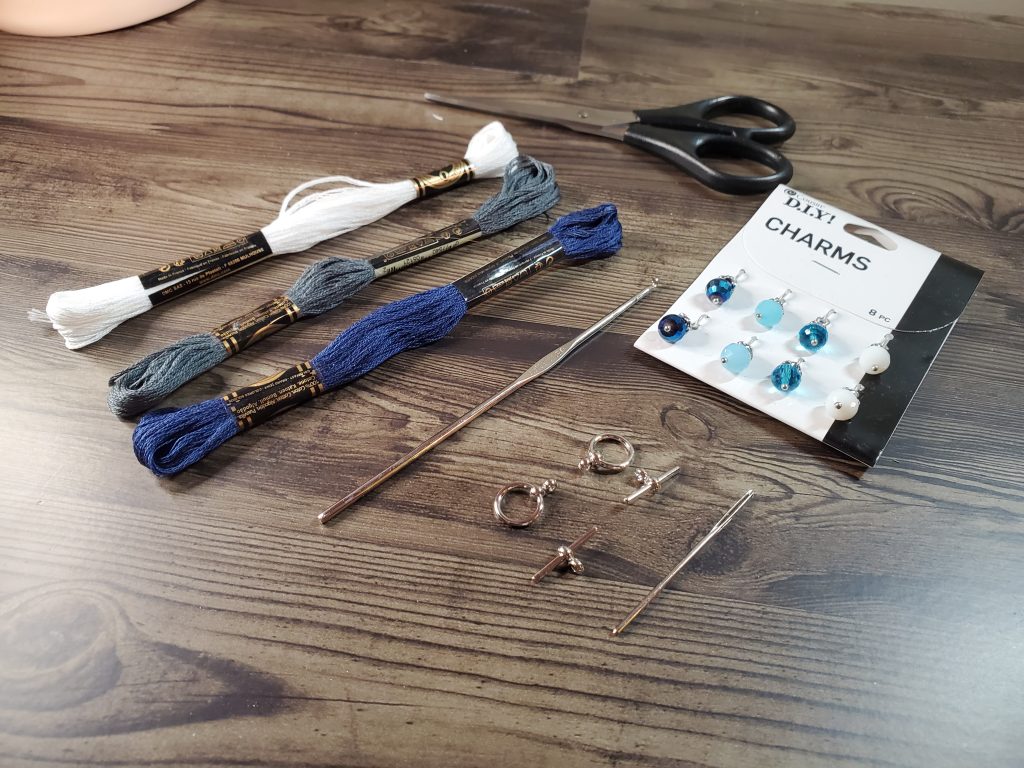
3 complementary colors of embroidery floss. I am using DMC Embroidery Floss in a shade of Blue (336), Gray (413) and White (B5200).
Crochet Hook. I am using a US Size 1, or 2.35 MM, crochet hook.
Clasps for both the choker and the matching bracelet. I used toggle clasps, but any type will do.
Charms (Optional)
Scissors
Yarn Needle
Transparent Tape
Choker
Let’s get started by making the choker.
Pro Tip: Embroidery Floss Hanks tangle easily. To avoid frustration, wrap your floss around a bobbin, or a piece of cardboard, before beginning. This will reduce the chances your floss will tangle. No need to buy anything. I used the tag from my toggle clasps.
Typically, when a pattern calls for more than one color, the pattern will refer to the colors as Color A, Color B, Color C, etc. For our project, it doesn’t matter which color we call A, B or C, although in some projects this can affect the entire outcome of a project. Today, though, you get to pick!
You’re going to start by making your slip knot with Color A. Make sure you have a long tail on the end. You’re going to need the extra thread to attach the clasp at the end of the project. I suggest having at least a 5 to 6 inch tail. You’re going to want a large tail to make attaching your clasp easier.
Once you have your slip knot made, put your hook inside and tighten it around your hook. Don’t pull too tight! You want your hook to be able to move and pull the yarn through. If it is too tight, you will have a difficult time creating your chain stitches!
Pro Tip: If you’re new to crochet, and need help getting started, check out Crochet Chain Stitch Tutorial!
Next, Yarn Over, or YO, to start your chain stitch. You should now have 2 loops of embroidery floss on your hook. Now, while holding both the working yarn and the tail, pull down and turn your hook to grab the upper loop and slide it through the bottom loop. Your first chain is done!
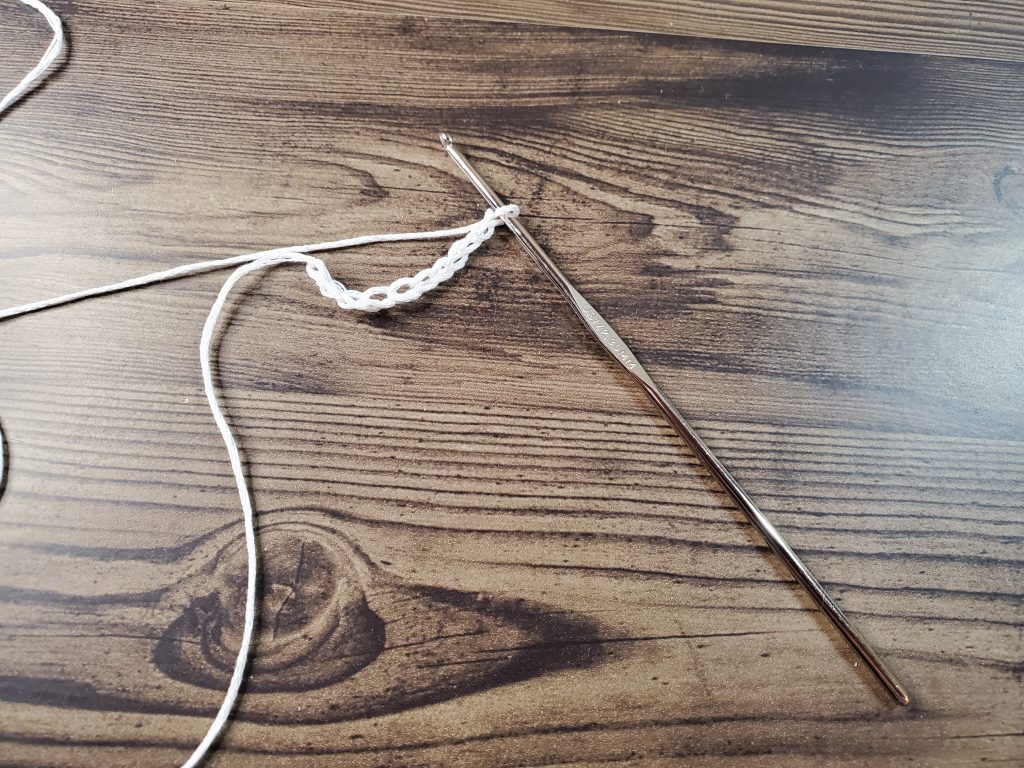
Continue repeating this until you have a total of 75 chain stitches (you can add more stitches for a longer choker, and also decrease the amount of stitches for a shorter choker), then Fasten Off, or FO. To do this, Yarn Over (YO), and pull through like you are making a chain stitch. Once the top loop is through the bottom loop, remove your hook, and pull the bottom loop to tighten the slip knot you’ve made against the project chains. Next, cut the floss, and pull through so there is no longer a loop. Make sure you’re leaving a 5 to 6 inch tail on the end, when you cut your yarn, for attaching the clasp.
You need to repeat this with Color B & Color C. Your chains should be equal in length. If they are NOT equal in length simply add more chains, or pull some out, to make them equal, before fastening off. There is no chain fairy who will come and yell at you and steal your hooks if one chain has 75 stitches and one chain has 80, I promise!. Maintaining accurate tension will help make sure the chains are equal, but stitch count does not matter for this project, as we are not working into the chain itself, yet. (That’s coming soon, when you’re ready!)
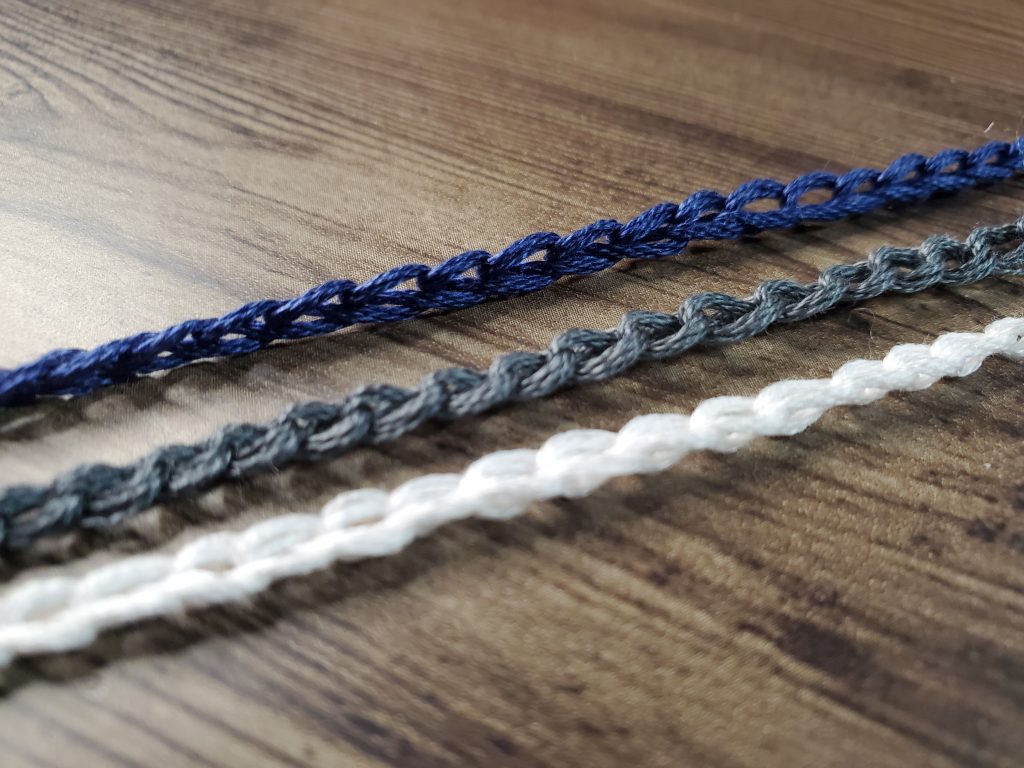
At this point, you should have 3 equal lengths of chain in 3 different colors.
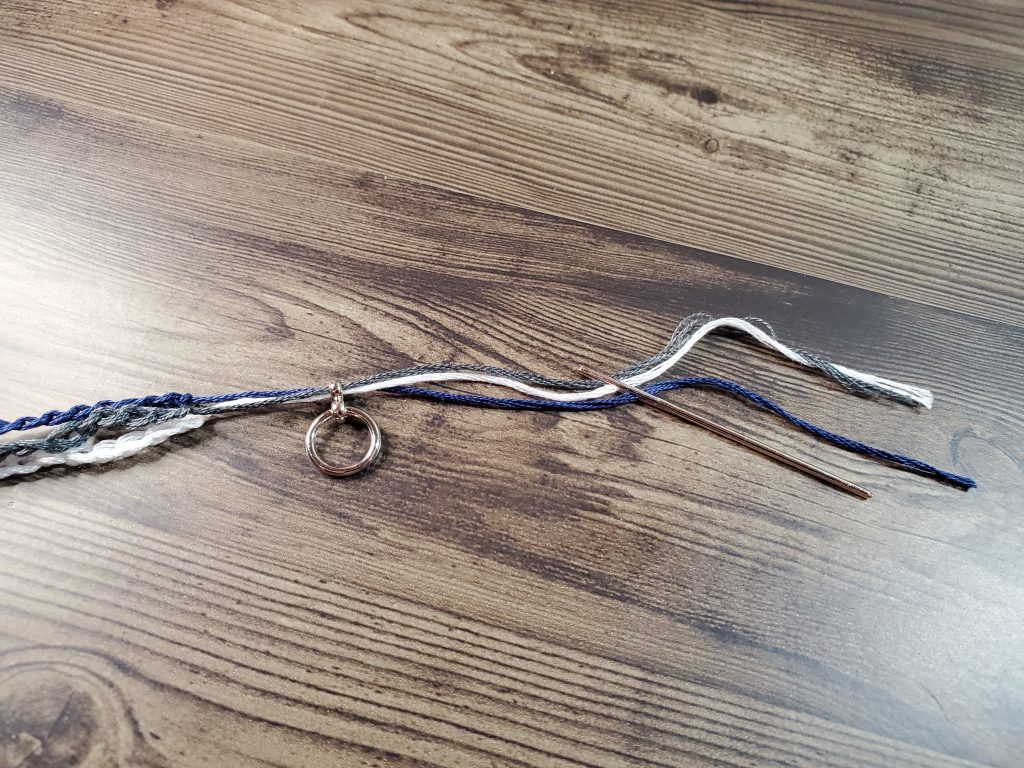
Now we need to attach on end to the clasp. I do this by lining up the ends of the chain (not the ends of the tail!) and snipping the tail slightly so that the ends are even. Next, I take a very small piece of tape, and place the end of the tail in the middle of the tape, and wrap the tape around the ends. It will look similar to a shoelace, though you should have tape extending from the top of the tail.
This may seem like a silly step, but I can promise you, you’re going to want to do this. Your yarn needle is not going to fit through the opening of the clasp, and by creating this shoelace on the end of your tail, you’re essentially turning the end of your tail into a needle. Make sure your tape rolled end is tight and as small as you can make it, and feed it through the end of your clasp and tie to attach. Make sure your knot is as close to the chain stitches as possible. You don’t want a long lead between the stitches and the clasps. (NOTE: if you have a large loop on your clasp for attaching, this step may not be necessary. My toggle clasps have a small hole, and this is necessary to attach the chains to the clasps).
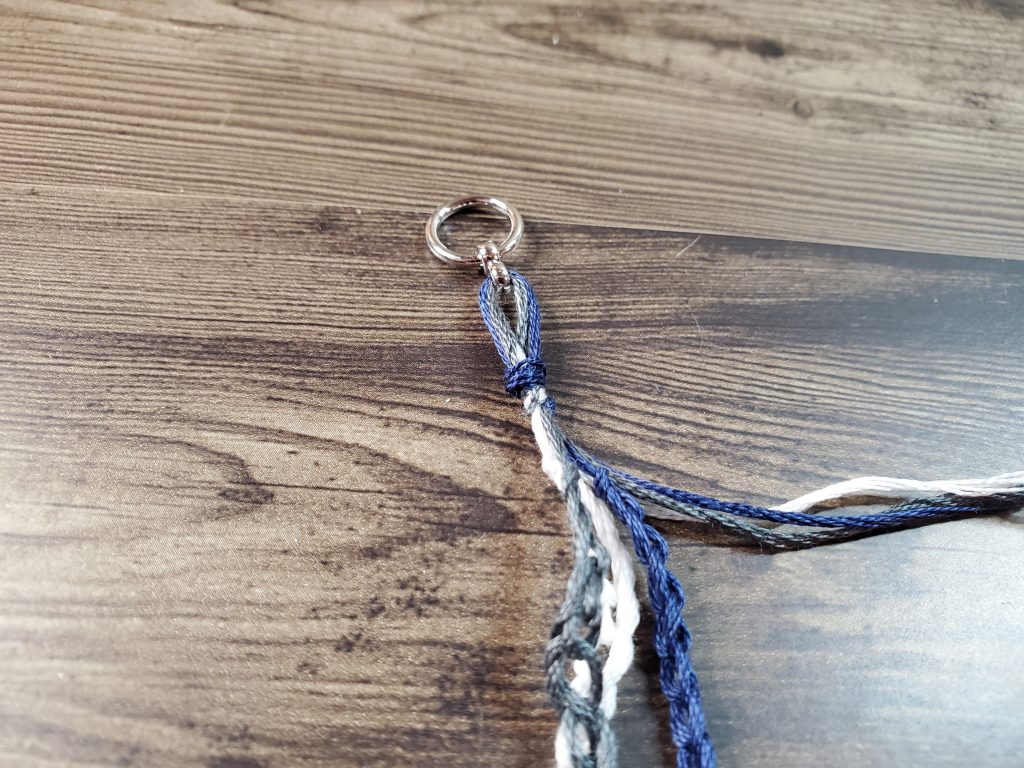
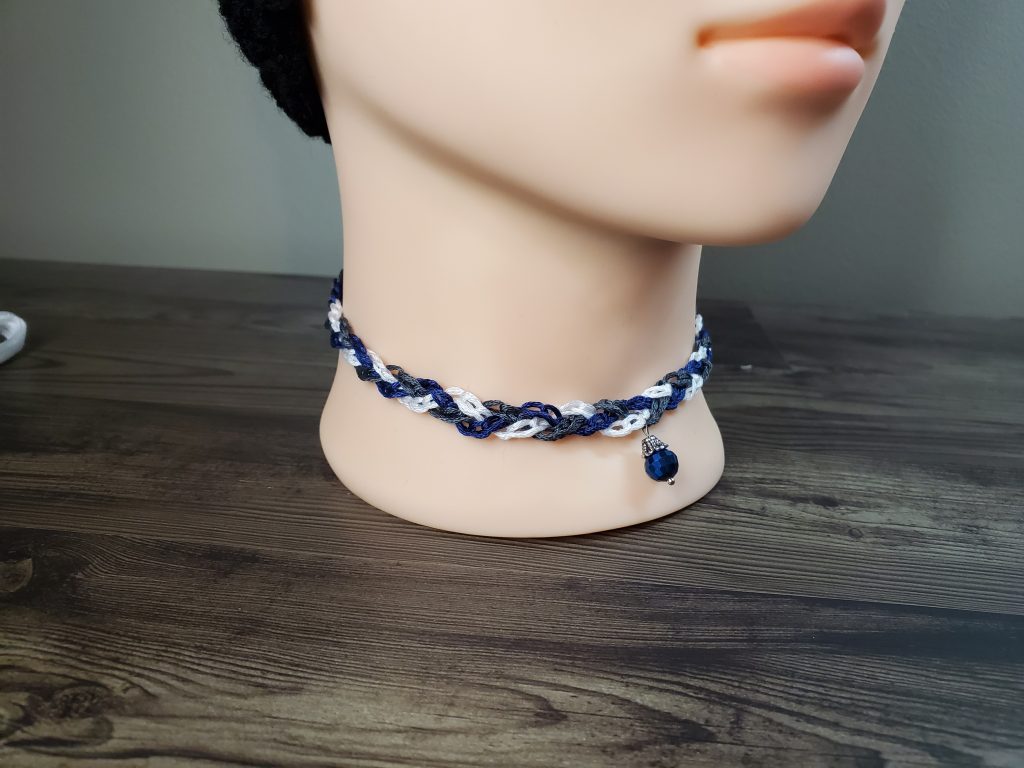
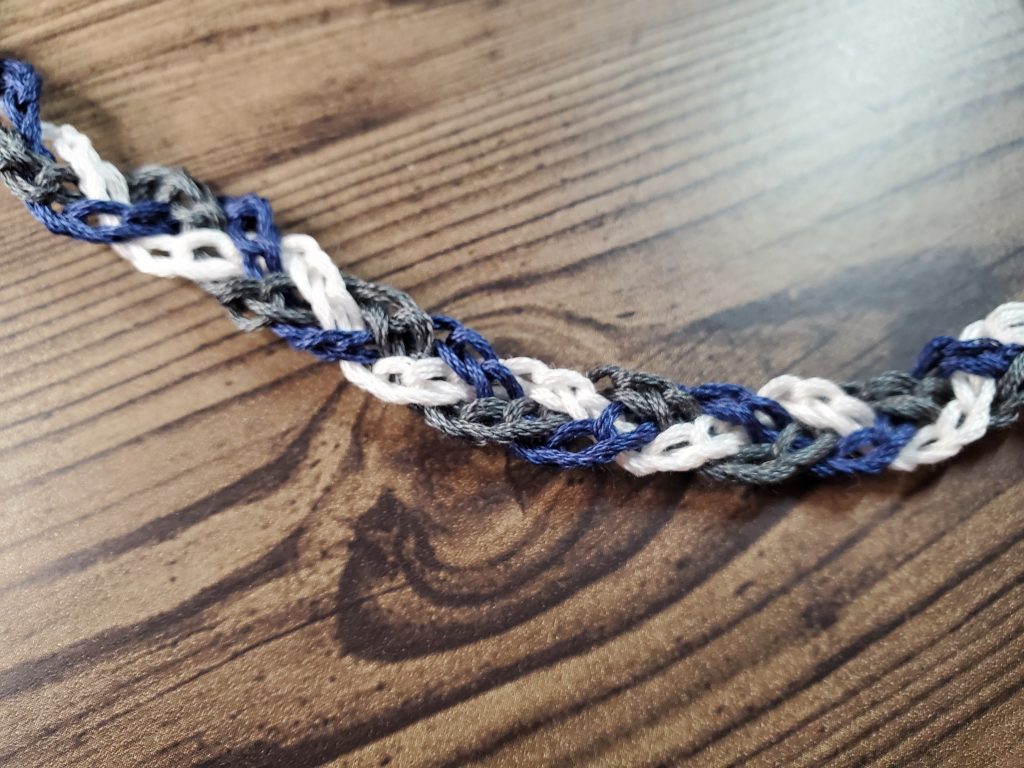
Once you have successfully attached the 3 chains to the clasp, you are going to start braiding the chains. You can do this as tight or loose as you want. I chose to do a fairly loose braid so there is some width to the choker, but if you are going for a thinner look, simply make your braid tighter.
Next, attach your braid to the other end of the clasp, in the same way you attached the first piece of the clasp.
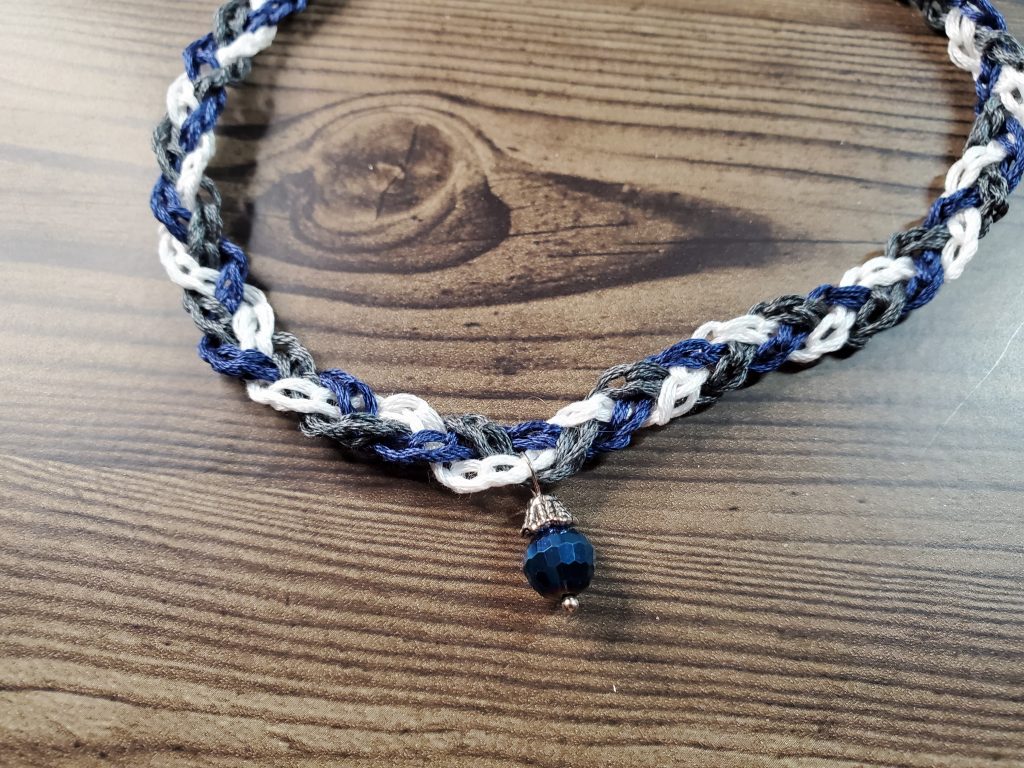
Finally, add your charm to the middle of the braid, and your choker is ready to be worn! Congratulations!

Bracelet
Making the matching bracelet to go with your choker is pretty easy, once you have made your choker.
Begin by making a chain of 40 with Color A and Fasten Off. (Again, if you feel 40 is either too long or too short, you can adjust the size of your bracelet by either increasing or decreasing the number of stitches). Next, create equal lengths of chains using Color B & Color C.
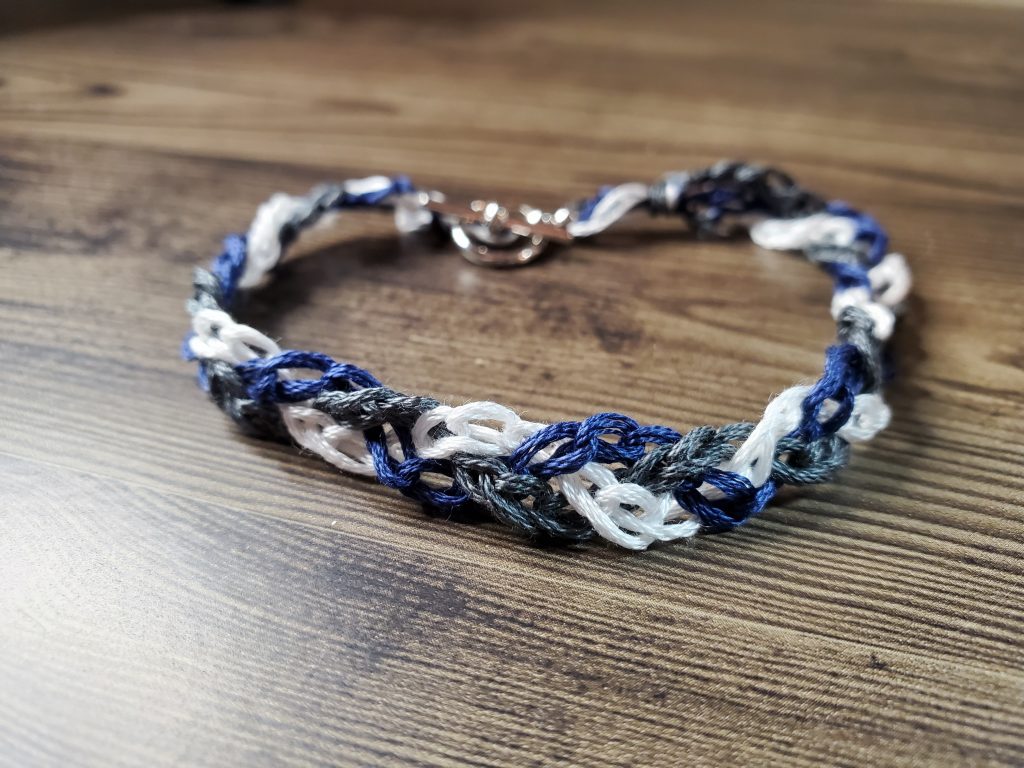
Using the same method you used earlier, attach your three strands of chain to your clasp.
Braid your chains to match your choker. Remember, a looser braid will give a wider bracelet.
Next, attach the braid to the other clasp, and add a charm, if desired.
Written Pattern
If you were to see this project in a book or on a website in a non-tutorial format, the following is how it would be written.
Choker
With Color A, Chain 75.
Fasten Off
With Color B, Chain 75.
Fasten Off
With Color C, Chain 75.
Fasten Off.
Attach all (3) strands to clasp.
Braid.
Attach to clasp.
Attach Charm (Optional)
Bracelet
With Color A, Chain 40.
Fasten Off
With Color B, Chain 40.
Fasten Off
With Color C, Chain 40.
Fasten Off.
Attach all (3) strands to clasp.
Braid.
Attach to clasp.
Attach Charm (Optional)
I hope you have enjoyed creating your Embroidery Floss Choker and Bracelet Combo. It was a cute and fun project! Show me yours in the comments below!