
Crochet Halloween Wreath
I absolutely love decorating for the holidays. Halloween is definitely at the top of my list of favorite holidays to decorate for. It’s just so dang fun. There’s candy, costumes, and decorations. People get so creative, and handmade costumes and décor are everywhere! As always, I wanted to add some more to my decorations this year, and decided to make a Crochet Halloween Wreath. I hope you enjoy it as much as I did.
Skill Level
Intermediate/Experienced skill level
Crochet Halloween Wreath – Materials List
- 2 skeins ruffle or netted yarn. I used Redheart Boutique Sashay, approximately 60 yards, however any netted yarn will work.
- Coordinating Worsted/Medium weight yarn for attaching to frame. I used Redheart Super Saver in Black
- Metal Wreath Frame. I used a 15” frame.
- Size J/6mm Crochet Hook
- Scissors or Snips
- Embellishments of your choice
Crochet Halloween Wreath – Pattern Instructions
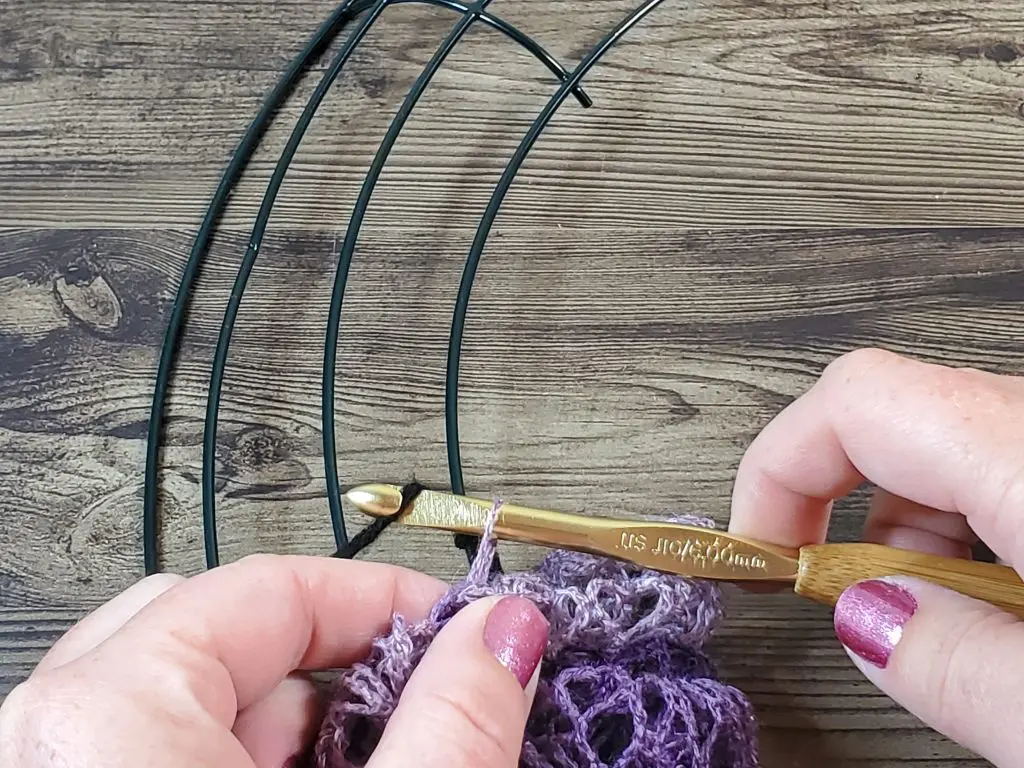
Holding the metal wreath frame with the front side facing you, attach your worsted/medium weight yarn to the frame by tying it to the innermost ring with a double knot.

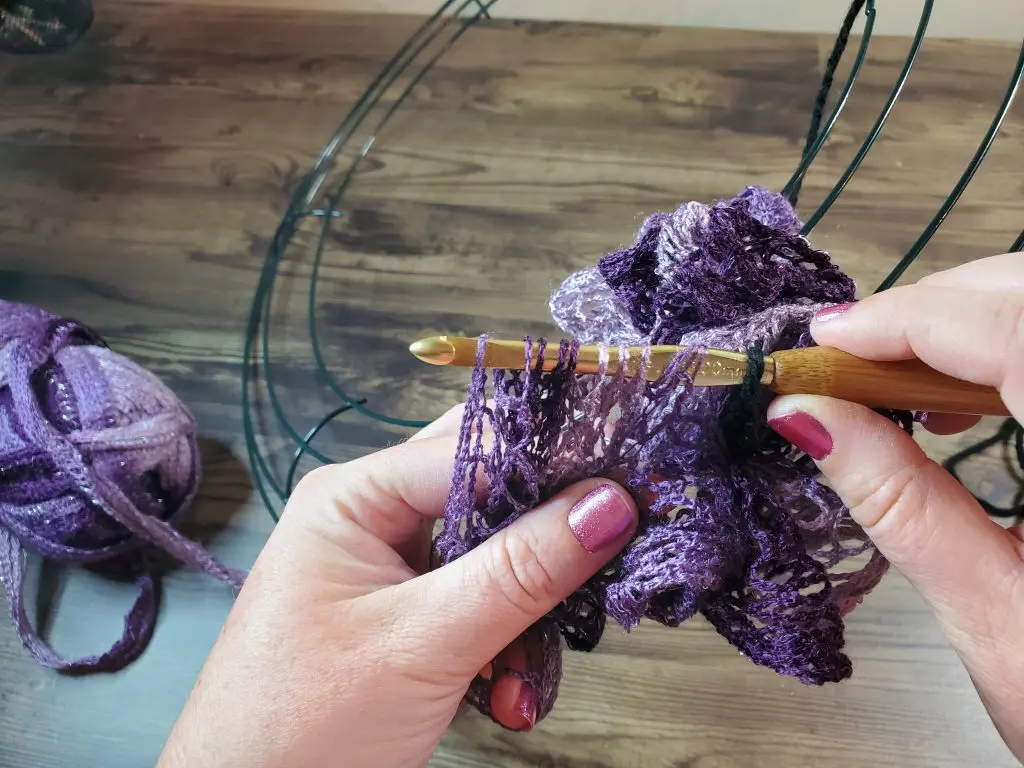
Next, spread your netted yarn apart to reveal the netting. It is easier if you spread open several feet at one time.

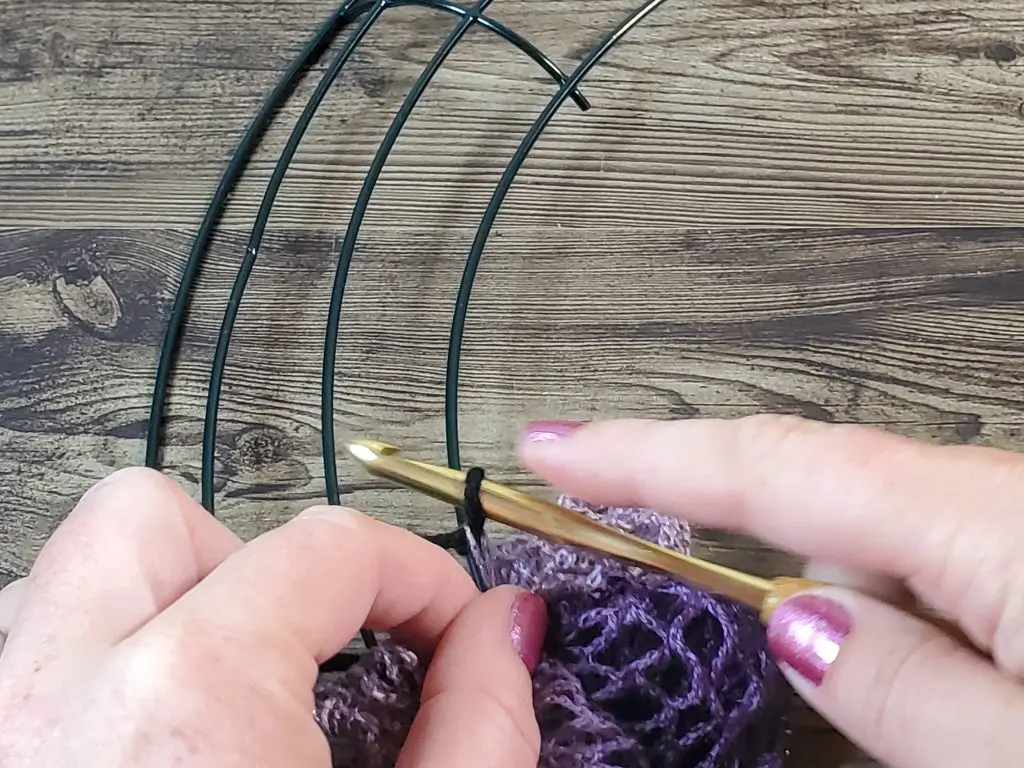
Insert your hook into the 3rd or 4th loop at the top of the netted yarn. Skip the next loop, and insert your hook into the front of the following loop. Repeat this (skip next loop, insert hook into following loop) until you have 10 loops of the netted yarn on your hook.
To complete the stitch, pull the top loop through all the loops on your hook. This creates the first ruffle.


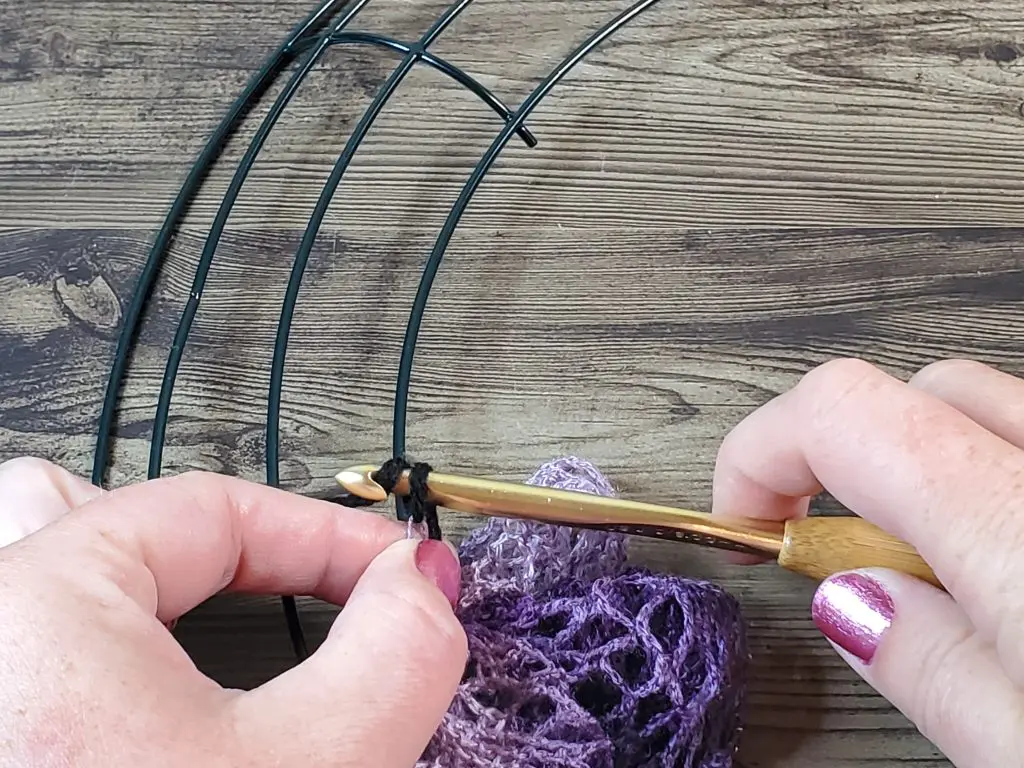
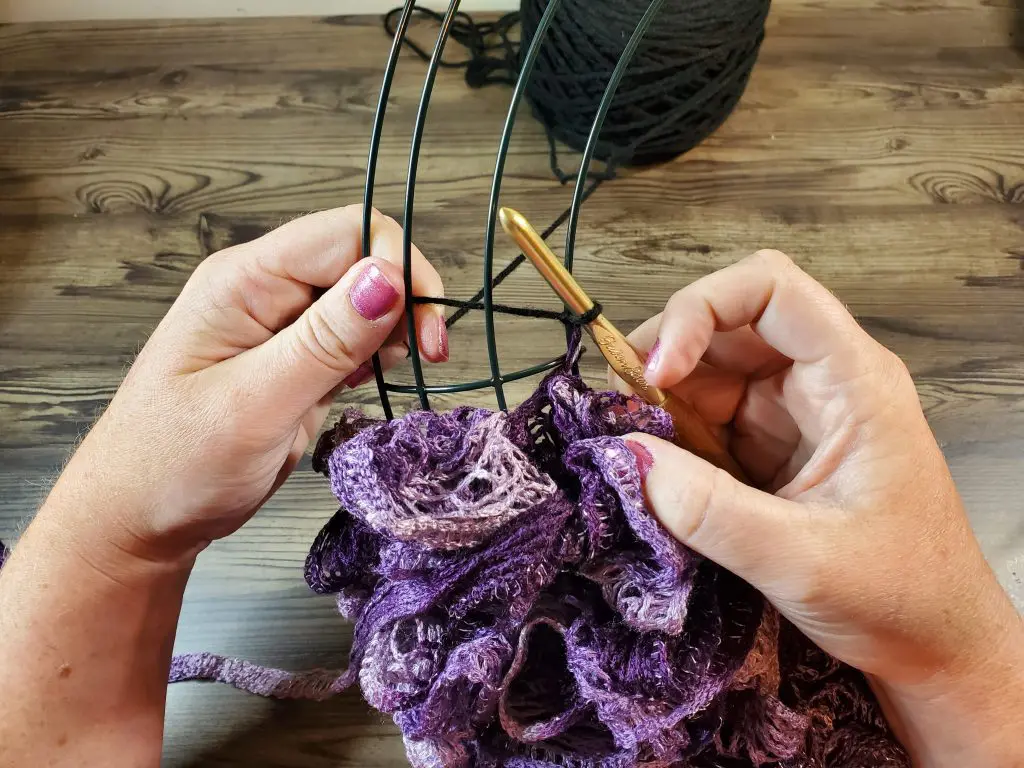
Now, we need to attach the ruffle to the metal wreath frame. To do this, you need to bring the yarn attached to the frame up between the innermost ring of the frame, and it’s neighboring ring. Yarn over the hook, and pull the loop through the netted ruffle. Chain 1 to secure the ruffle to the ring of the metal wreath frame. From the behind the frame, pull the attaching yarn back behind the frame, and tighten the chain stitch.
Next, begin the next ruffle stitch. You will do this by inserting your hook back into the netted yarn, as before. Skip a loop, and from the front, insert your hook into the following loop. Do this 10 times. Pull the top loop through all loops on the hook. Including the attaching yarn.


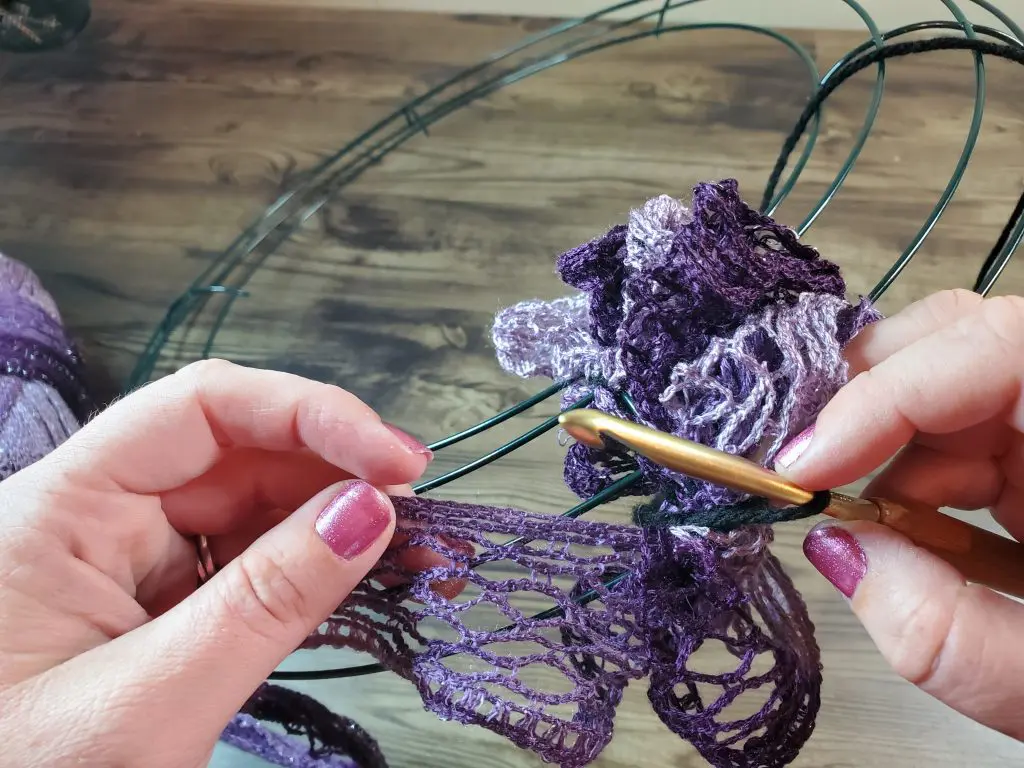
Next, attach the ruffle to the next ring of the frame by bringing your attaching yarn back up through the next space between rings. Yarn over, and pull through the loop of the ruffle, yarn over again with the attaching yarn, and make a chain stitch to secure the ruffle to the frame. Tighten by pulling the attaching yarn back behind the frame. Repeat across each ring of the metal wreath frame.
Once you have attached your ruffle to the outermost ring of the frame, rotate the frame so that the row of ruffles you just created is above both working yarns.
Next, pull the attaching yarn back behind the wreath, in the new working direction. To secure it in the new working direction, pull the attaching yarn up through the first space between the rings, yarn over, and pull through the loop on the hook. (Note: this step isn’t totally necessary, but I found that it helped to keep the attaching yarn in the right direction, and helped to keep the yarns from tangling, so I highly recommend this step.)


Bring your netted yarn down in front of your hook so you can work the next ruffle. Once you create your ruffle, bring the yarn up in the NEXT space (not the first space), and attach as before. Repeat across the metal wreath frame.


When you finish and attach the ruffle on the innermost ring, rotate the wreath back in the other direction, so the previous rows are now at the bottom. Secure the attaching yarn back behind the frame by bringing up the yarn in the first space, yarn over, and chain one. Make your next ruffle and continue to repeat the two rows around the frame.
When you reach the bars holding the frame together, make sure to bring the attaching yarn to the other side of the bar before securing it to the frame at the beginning of the new row.
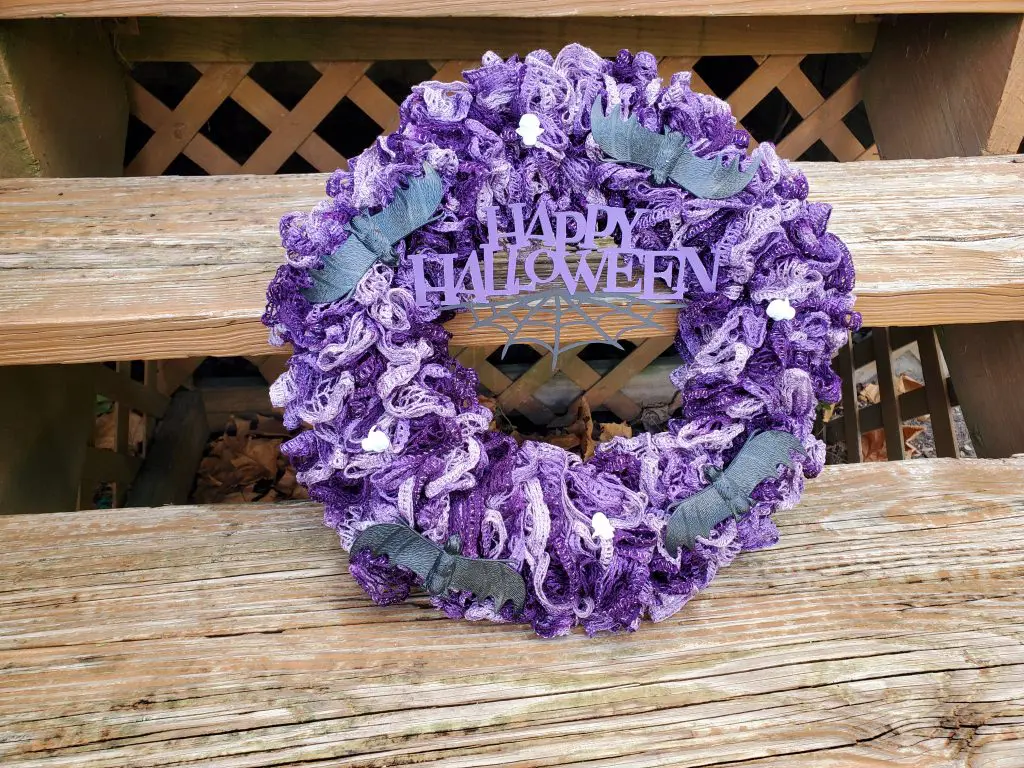
For the 15” metal wreath frame pictured, I did 9 rows in each divided section of the frame. This seemed to give a good volume to the wreath, without condensing the ruffles too much.
Once you have filled the frame, fasten off and tie your yarn tail to the frame. Attach any embellishments, making sure to attach anything heavy to the frame itself.
Did you make the Crochet Halloween Wreath? I would love to see it! Post your pictures below, or join my Facebook Group to share with others!


Thank you!!1