How to Crochet a Border
You’ve finished your project, but feel like it needs a little something. A border. But that can be a bit intimidating if you’re not sure how to crochet a border. Getting your border wrong can make a beautiful project go a bit wonky. However, getting your border right can bring a new element to your project that really makes it pop.
Why Crochet a Border
Why crochet a border? You certainly don’t have to. But sometimes, borders make a project. A fancy border on a simple blanket can add an elegant flair to a baby blanket. Or a simple border can finish the edges of a colorful lovie. Sometimes, our edges come out a little wonky (admit it, it happens!) and we use borders to hide those small imperfections.
How to Crochet A Border – Overview
When looking at how to crochet a border for your project, the most important thing to keep in mind is stitch count. There are different rules for the sides, the top/bottom and the corners you need to keep in mind when you are planning your border. Getting the right stitch count for your border will help it lay flat, and hold the same shape as the rest of your project.
So how do you determine your stitch count?
How to Crochet A Border – Stitch Counts for Top and Bottom Edges
The stitch counts for rows are fairly simple to figure out. The stitch count for your border on the top and bottom edges will be the same as the stitch counts for the rows that you are working on. So, if your project is a blanket, 175 stitches wide, your top and bottom edges will have 175 stitches in the first round (this is an important part to remember, subsequentrounds will have more stitches).
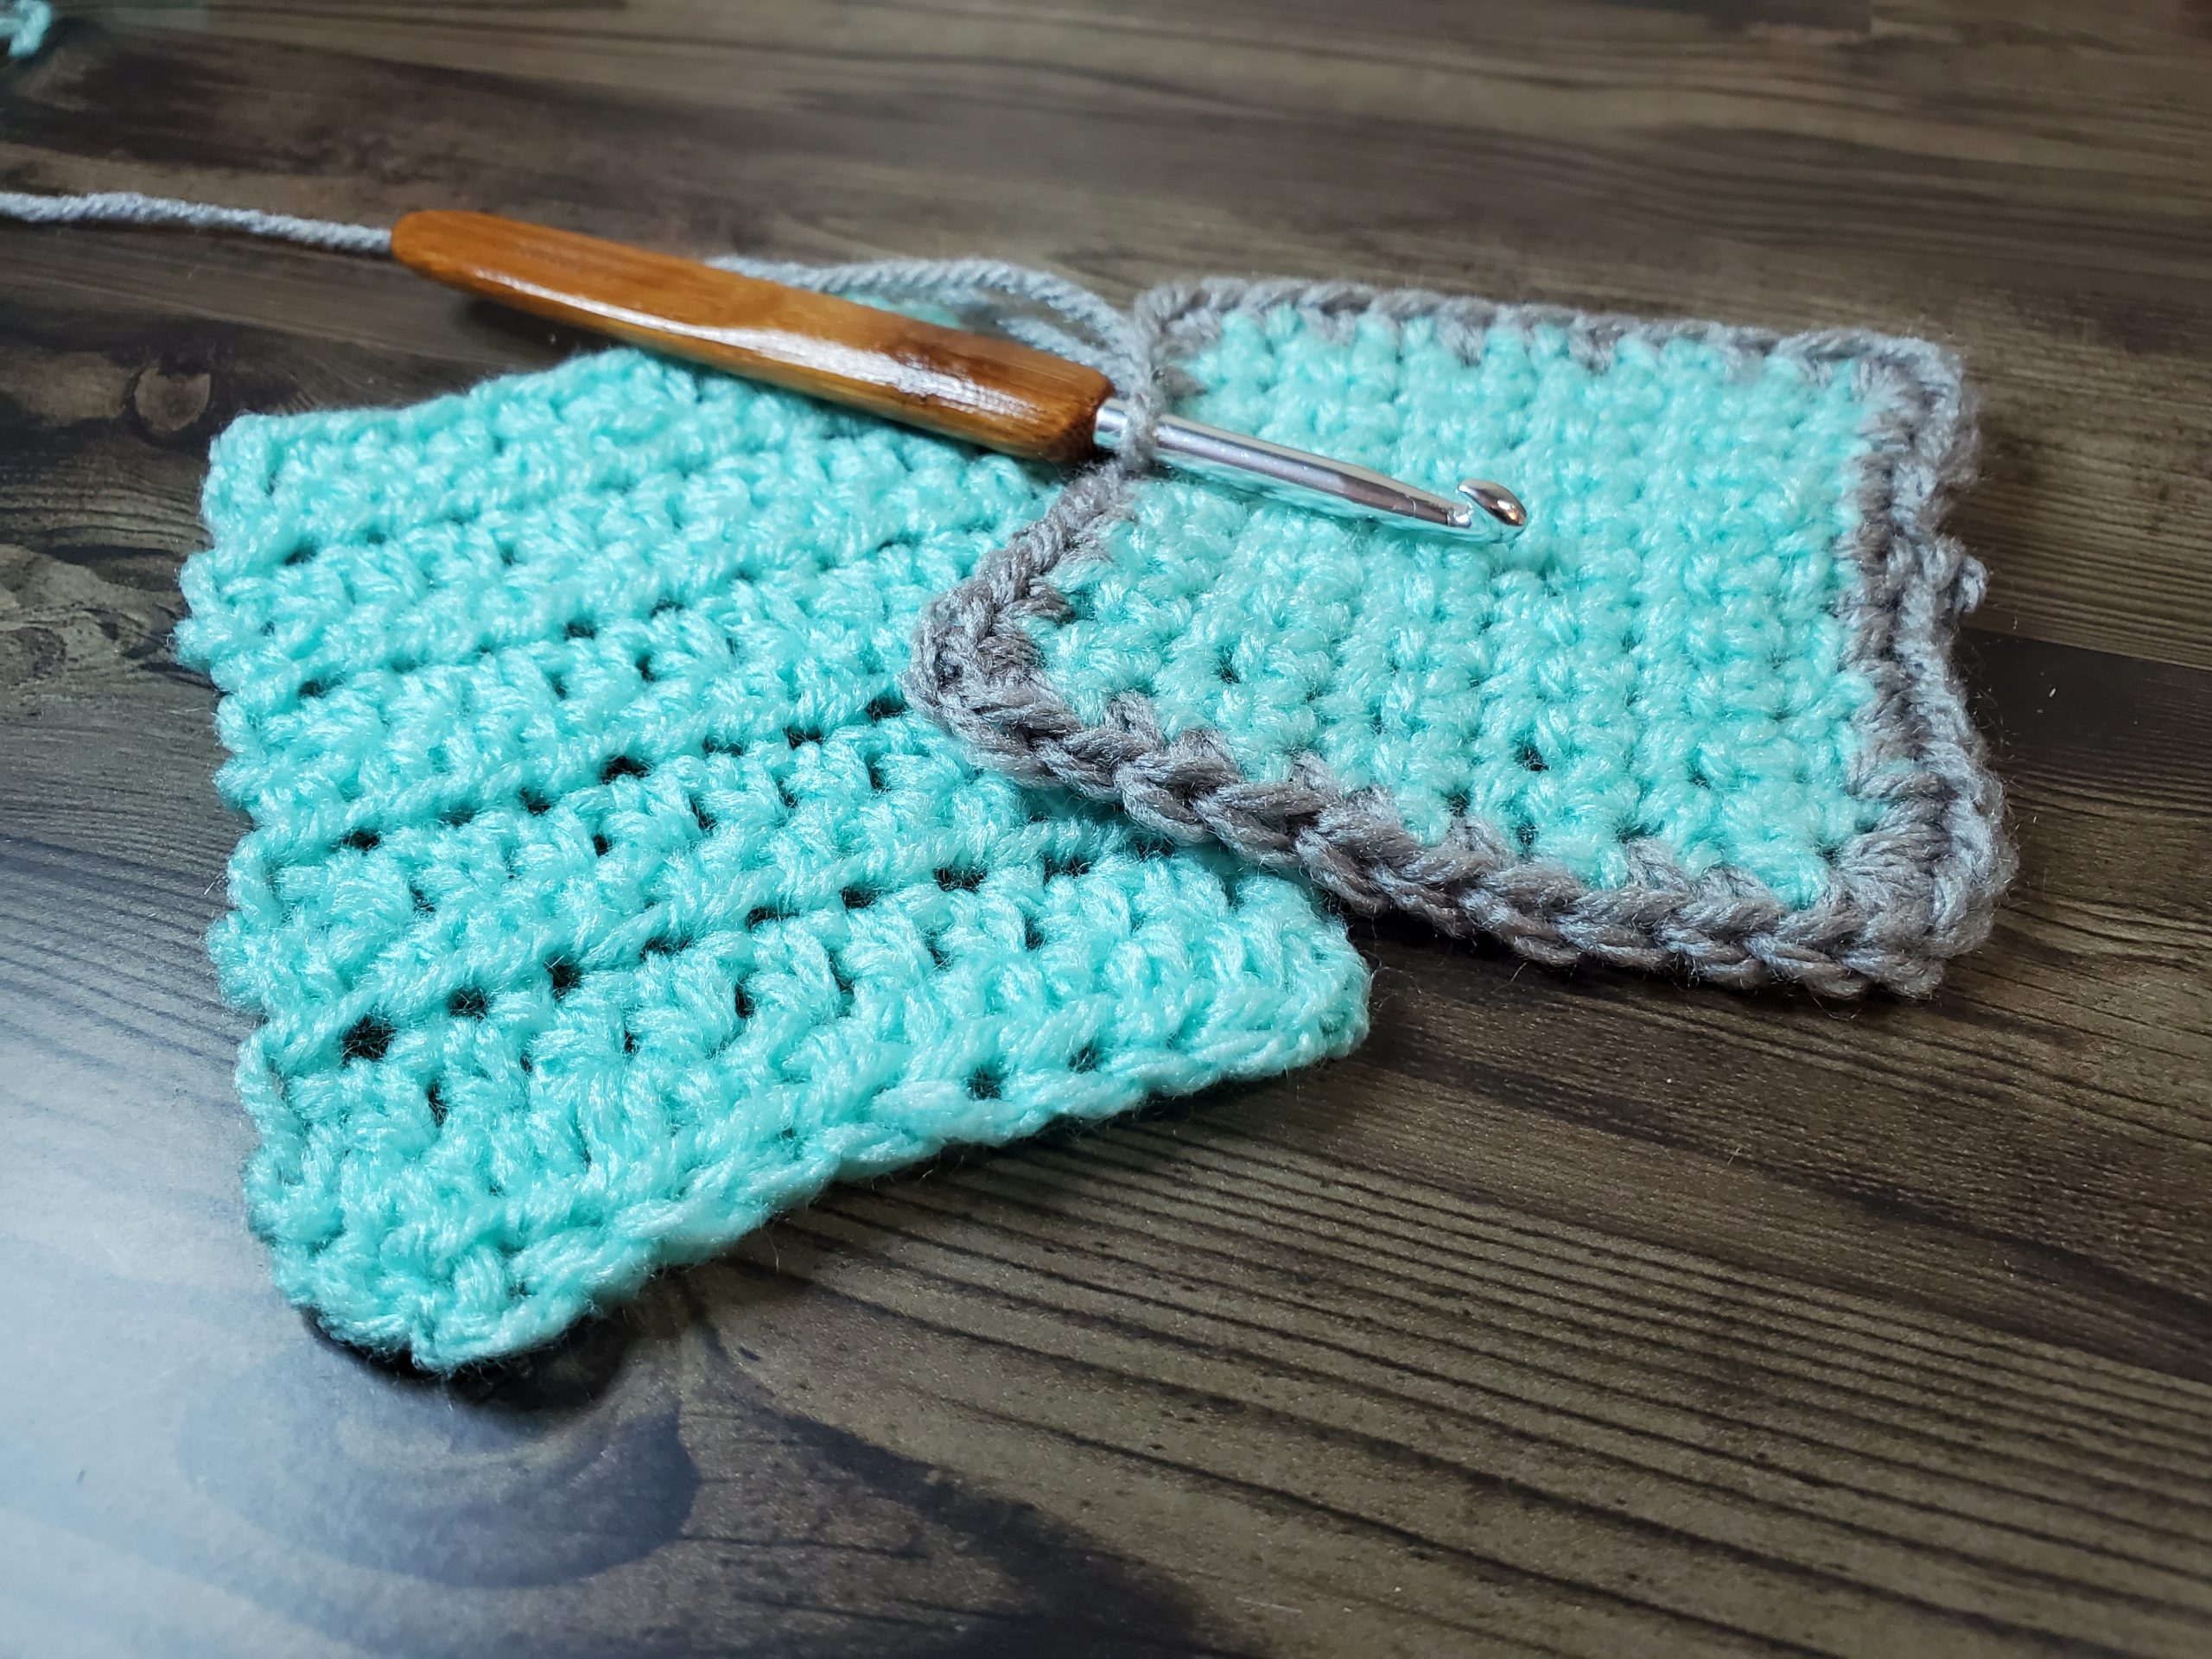
How to Crochet A Border – Stitch Counts for Corners
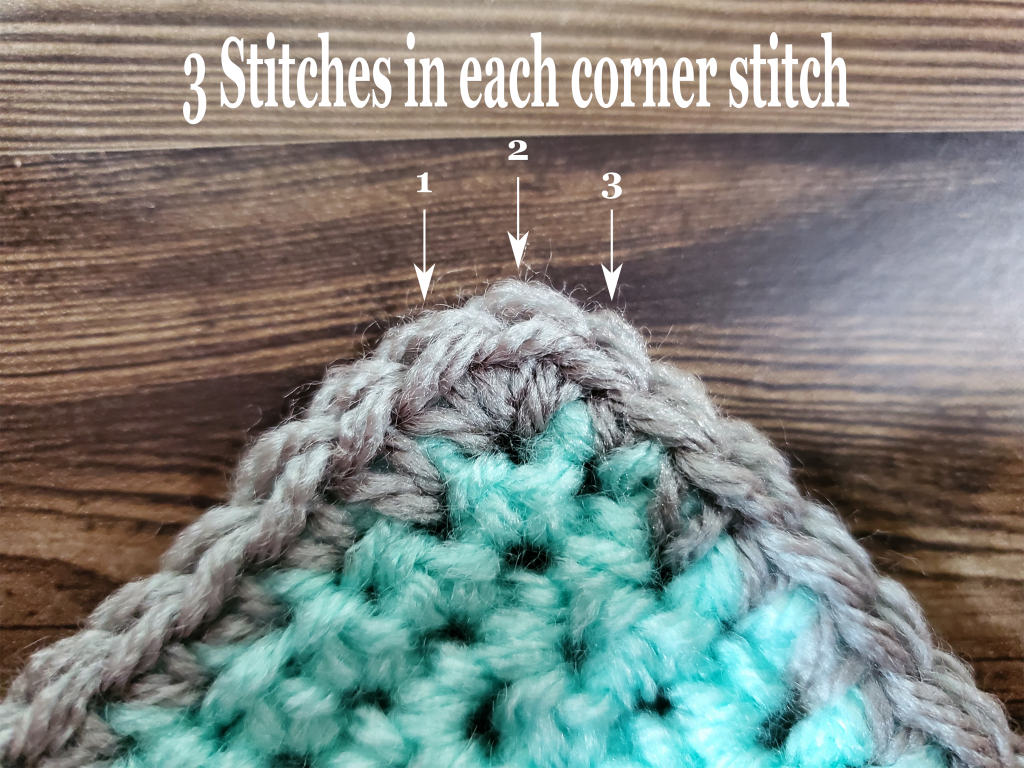
Getting your stitch count right for your corners is very important. If you don’t get your count right, your border can pucker at the corners, which can ruin the look of your project, and leave you very frustrated. Your corner should always include a stitch for the side you are finishing up, a stitch for the new corner that you are creating, and a stitch for the side you are about to begin. Some people use a chain stitch for the corner, and that is perfectly acceptable. It makes it easier to work the corner of the next round, when you’re working multiple stitches into the chain space, rather than a single stitch. Some patterns call for a stitch to be worked, to avoid a gap. Either way is perfectly acceptable.
How to Crochet A Border – Stitch Counts for Sides
The stitch counts for the sides of your project are where things can get a little tricky. If you put too many stitches, your border will get wavy. But if you don’t have enough, the base of your project will pull together, creating a wave effect on the inside edge of your border. Since you are working along the side of your stitches, and the heights of each stitch varies, your stitch count is going to depend on the stitches you used in the main part of your project.
Single Crochet
If your project is made with single crochet, the sides of your crochet border will be simple. You will put one stitch in each of the rows down the side of your project, as the single crochet is as tall as the width of one stitch. If your project is 100 rows tall, you will have 100 stitches in this edge of your border.
Half Double Crochet

If your project is made with half double crochet, you’re going to need to add stitches to some rows on each side, to create the same length as the rest of the projects. Half double crochet are typically 1.5 times as tall as they are wide. But you can’t exactly put a half a stitch into the row. So what you will do here, is crochet 1 stitch into the first row, 2 stitches into the next row, and repeat down the side of your project. This will give you an average of 1.5 stitches per row, giving you the length you need for the sides of your project. If your project is 100 rows, you will have 150 stitches on this edge of your border.
Double Crochet
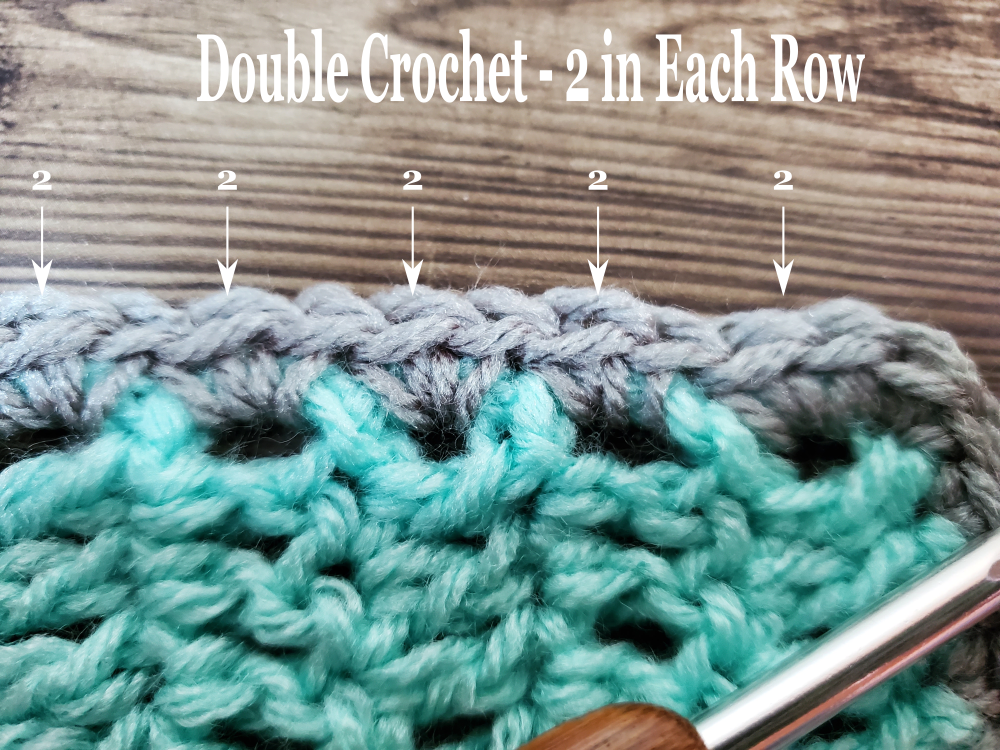
If your project is made with double crochet, you’re going to need to add even more stitches to each row to get the edges the same length as the rest of your project. Double Crochet stitches are typically twice as tall as they are wide. This means that for every row of Double Crochet, you will work 2 stitches. If your project is 100 rows, you will have 200 stitches on this edge of your border.
How to Crochet a Border – Round 2 and Beyond

Once you have the first round of your border completed, the stitch counts get a bit easier. Each edge will have one stitch worked into one stitch of the previous round. Remember though, that in order for your project to lay flat, and not turn up like a bowl, as your border gets bigger, the stitch count needs to increase as well. We do this in the corners, just like we did in the first round. Each corner will have 3 stitches: one for the edge you are finishing, one for the corner you are creating for this round, and one for the edge you are starting. Your border should increase by a count of 8 for each round – or 2 stitches for each edge.
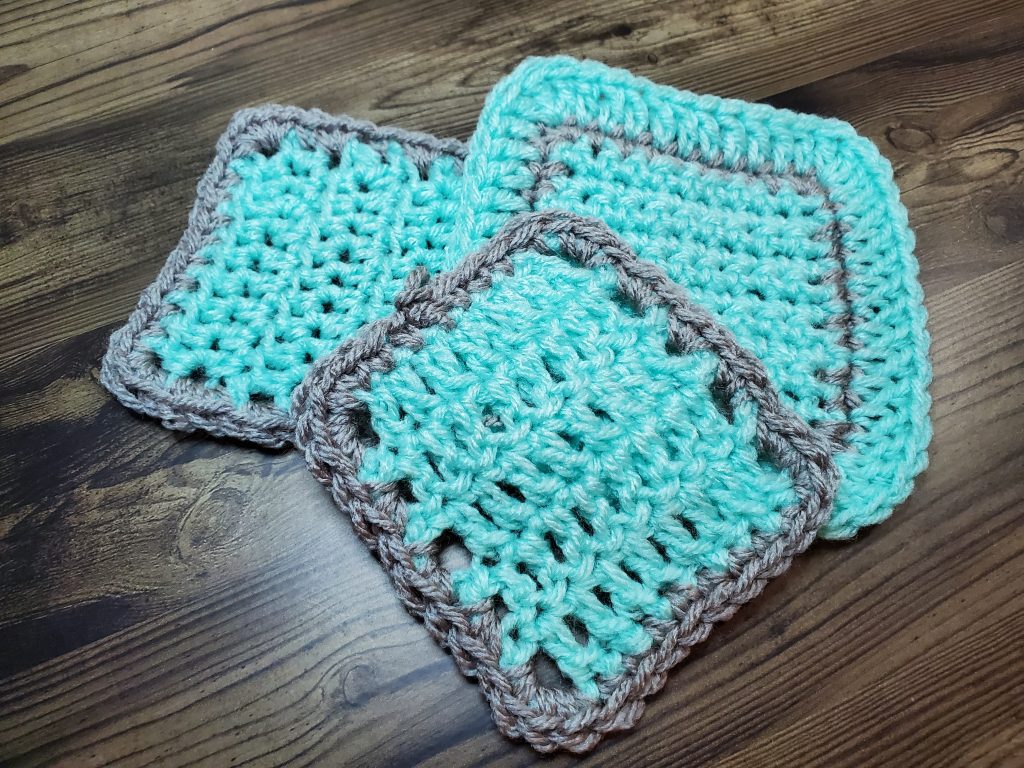
For practice on a smaller scale project, check out my Basic Crochet Coaster tutorial!
Don’t forget to follow me on Facebook or join my Facebook Group!