Crochet Chunky Necklace
Welcome to Beginner Project three! The Crochet Chunky Necklace, made with the crochet chain only! This project is more difficult than the previous chain stitch projects, because we will be using two new techniques; two strand crochet and crocheting with beads!
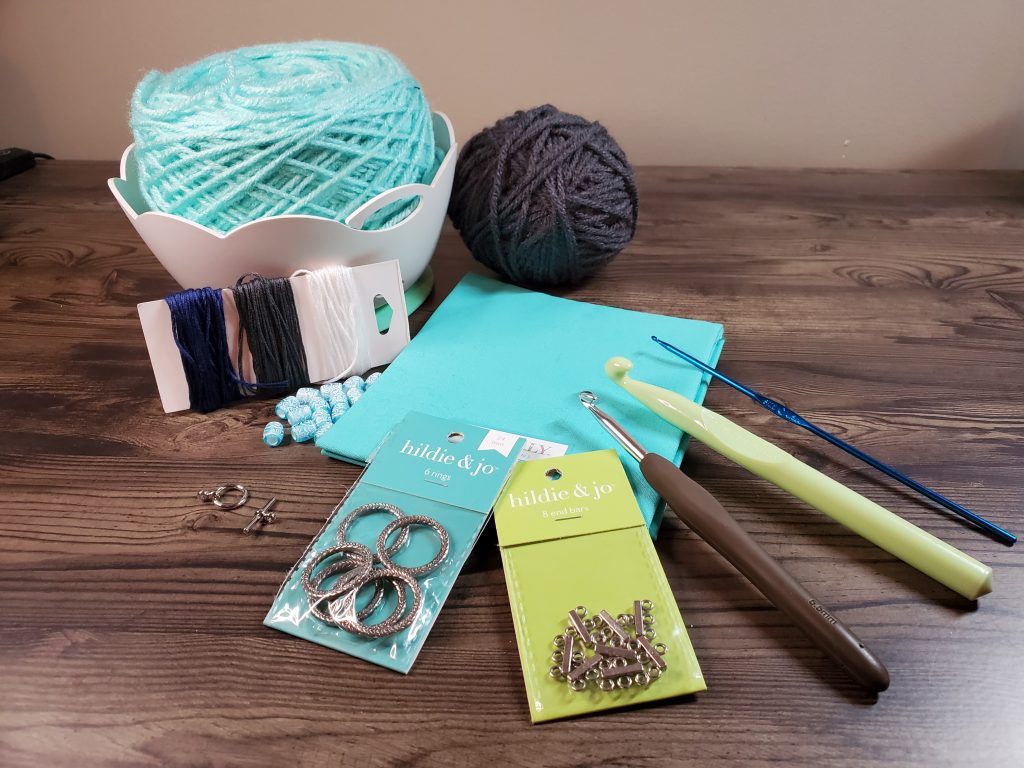
What you need for the Crochet Chunky Necklace

- 2 colors worsted weight yarn (I used a mint green and dark gray)
- Quarter flat of complementary color (I used a mint green fabric)
- Embroidery floss in complementary color (I used the gray I had leftover from my Embroidery Floss Choker)
- 2 Jewelry rings
- 2 Jewelry end bars
- 12 beads with large center hole (I used a mint green to complement the other colors)
- Scissors
- Size P – 11.5mm crochet hook
- 2.35mm crochet hook
- 5.5mm crochet hook
- Optional: clasp
Let’s Get Hooking!
The Crochet Chunky Necklace needs four pieces for complete assembly. We will have 3 different strands of chains in the front, and use our fabric in the back to complete the loop.
Start by cutting a 2” strip of fabric off your quarter flat and set it aside. This will be used for the back strap of the necklace. If you want to use a clasp, instead of having a necklace that you slip over your head, you will want to cut 2 strips.
Next, using the embroidery floss, create a chain of 35. Remember to leave a long tail on both ends of this piece, for attaching to the jewelry rings! Set this piece to the side with your fabric.
Beads!!
The third piece, which is the second strand for the front of our necklace, will have our beads! Start by putting all the beads on the yarn. I used my dark gray yarn with mint green beads, for contrast. If you need to, use tape on the end of your yarn to get the beads threaded onto the skein.

Once you get your beads threaded, push them toward the skein, make your slip knot and tighten it around your hook. Again, make sure to leave a long tail for making assembly easier, later on!

Now, chain 10. And here is where it gets fun! Take one bead and bring it towards your hook. Let it stop comfortably next to the 10th chain stitch. Do not push it over the chain. Next, we are going to do a chain stitch around the bead. Holding your yarn like you normally would, yarn over and pull through the loop on your hook. Your bead should be wrapped by the chain stitch and held in place. Repeat this process for all 12 beads.
Once you have all of your beads chained into your strand, make 10 more regular chains to balance out the strand. Fasten off and leave a long strand for assembly. Set this aside with our first 2 pieces.
Two Strands!
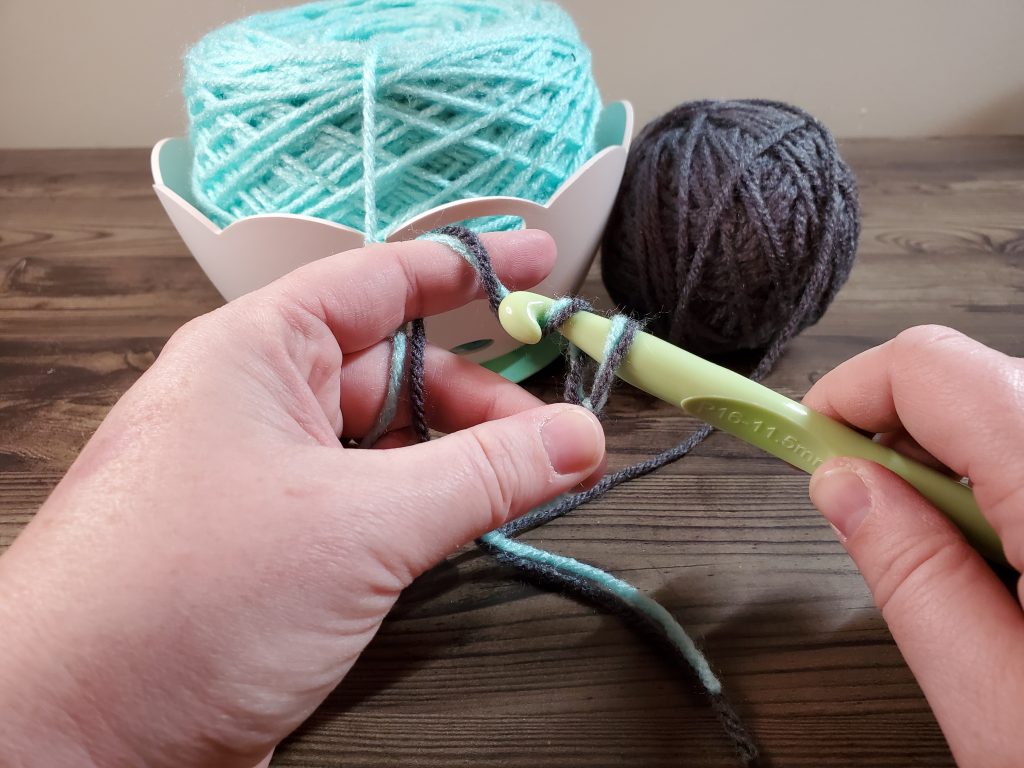
The final piece we need to make before assembly is the two stranded crochet chain. This stitch is made in the same way we make the other chains, but we will be using a larger hook. The double strand technique using 11.5mm hook will create a wider chain that is perfect for our chunky necklace.

Start by creating a slip knot using both colors of your worsted weight yarn. Remember to leave a long chain for assembly. I am using a dark gray and mint colors. Put your 11.5mm hook into the hole and tighten it around your hook.

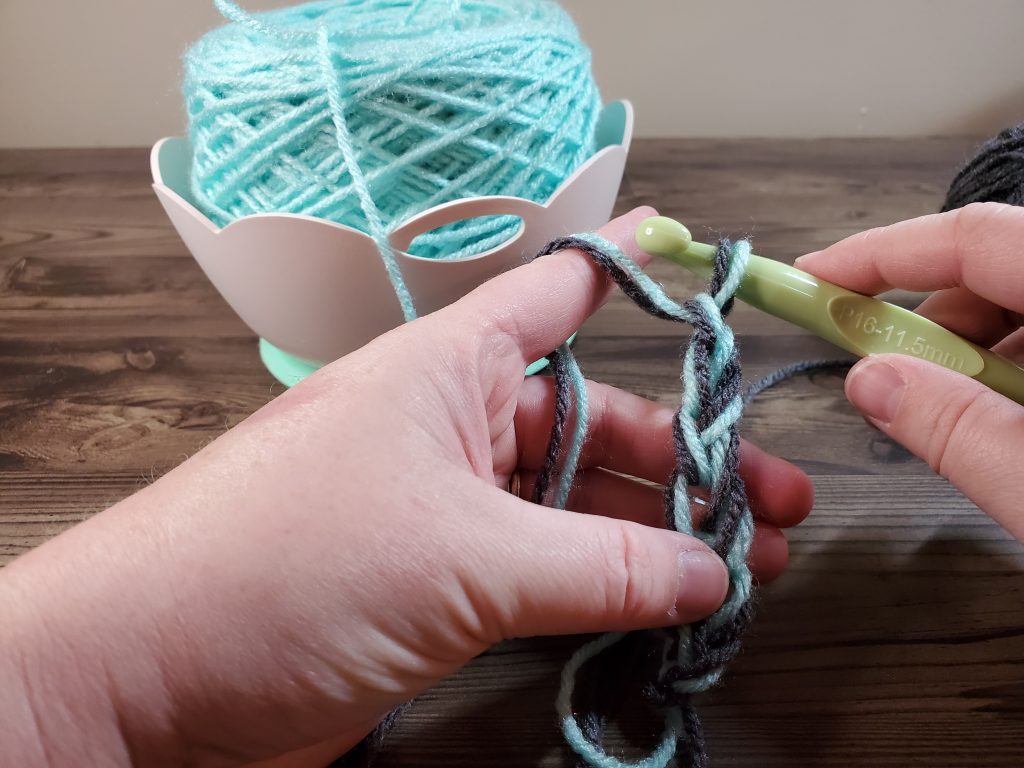
Next, yarn over using both hooks, and pull both strands through the double stranded loop on your hook. These chains will look looser than normal, but that is the look we are going for, to achieve the look of a chunky necklace.

Continue making chains in this way until you have a chain of 20 stitches. Fasten off and leave a long chain for assembly.

Assembly
Now we get to assemble our chunky necklace!!
First, lay your front pieces out in this order:
- Top layer – Embroidery Floss Chain
- Middle Layer – Beaded Worsted Weight Chain
- Bottom Layer – Two Stranded Crochet
Your necklace layers should go from thinnest to thickest.
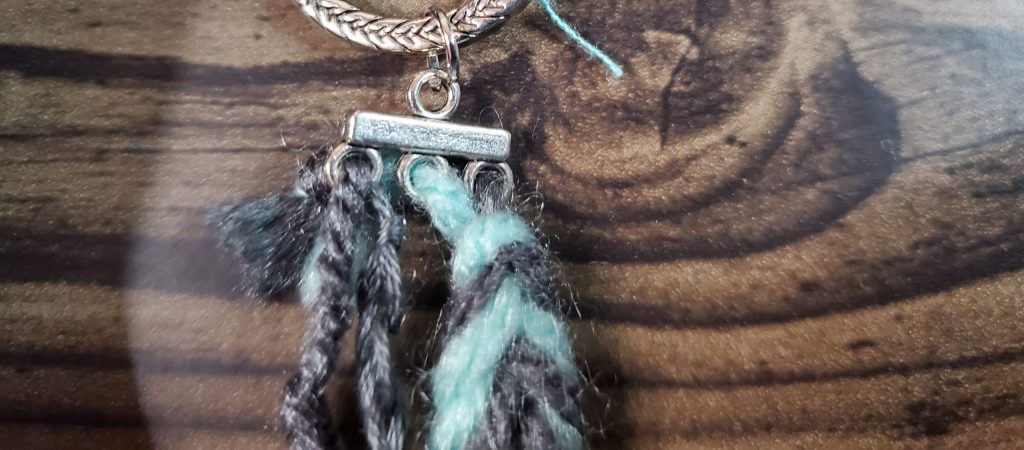
Next, we are going to use our end bars to connect the chains together. My end bars have 3 circles on them. The top circle, I threaded both the embroidery floss chain and the beaded chain into. I used a fisherman’s knot to secure them. Then put one strand of the two stranded chain into each of the bottom loops, and secure them in the same manner. Note: Two strands of worsted weight will not fit through these holes.
Now, making sure not to twist or tangle the strands, attach the other side to your other end bar.

When you are done, use a jump ring to attach the end bars to the jewelry ring.
I decided I wanted my chunky necklace to slip over my head, rather than have a clasp in the back. So I scrunched up my fabric and tied an end to each ring to complete the loop. If you would rather have a clasp in the back, you will need 2 strips of fabric from your quarter flat. Fold the fabric in half, and put the fold through the ring. Once the fold is through the ring, thread the loose ends of the fabric through the loop and pull tight. Do this on both sides. You will then have to use a needle and thread to attach the fabric to your clasp.

You have completed your Crochet Chunky Necklace! If you were completing these projects as part of the learning to crochet tutorial, you are now ready to move on to the Single Crochet Stitch and working into the chain! Congratulations!

Share your projects below! I can’t wait to see them!


One Comment